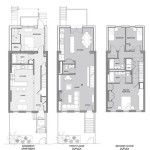
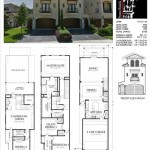
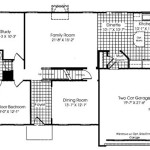
Creating a floor plan is an essential part of any home renovation or design project. A floor plan is a detailed drawing that shows the layout of a room or building, including the walls, windows, doors, and other features. Creating a floor plan can be a time-consuming and challenging task, but there are now many software programs and online tools that make it easier than ever before.
One of the best things about using a floor plan creator is that it can save you a lot of time. Instead of spending hours measuring and drawing by hand, you can simply input the dimensions of your room and the software will create a floor plan for you. This can save you a lot of time, especially if you are working on a large or complex project.
In this article, we will provide you with a step-by-step guide on how to create a free floor plan. We will also provide you with some tips and tricks for getting the most out of your floor plan creator.
When creating a free floor plan, there are a few important things to keep in mind.
- Measure your room accurately.
- Choose the right software or online tool.
- Start with a basic layout.
- Add walls, windows, and doors.
- Include furniture and fixtures.
- Experiment with different layouts.
- Get feedback from others.
- Save your floor plan.
By following these tips, you can create a free floor plan that will help you visualize your space and make informed decisions about your home renovation or design project.
Measure your room accurately.
The first step to creating a free floor plan is to measure your room accurately. This will ensure that your floor plan is to scale and that all of the elements are in the correct proportions.
- Use a measuring tape to measure the length and width of your room.
Be sure to measure from wall to wall, including any alcoves or recesses.
- Measure the height of your room from floor to ceiling.
If your room has a sloped ceiling, measure the height at the highest point.
- Measure the location of all windows and doors.
Be sure to note the width and height of each window and door, as well as the distance from the wall to the center of the window or door.
- Measure the location of any other fixed objects in the room, such as fireplaces, built-in shelves, or radiators.
Be sure to note the dimensions of each object, as well as the distance from the wall to the center of the object.
Once you have measured your room accurately, you can begin creating your floor plan.
Choose the right software or online tool.
There are many different software programs and online tools that you can use to create a free floor plan. Some of the most popular options include:
- SketchUp
SketchUp is a free 3D modeling software program that is easy to use and can be used to create both simple and complex floor plans. SketchUp is available for both Windows and Mac.
- Floorplanner
Floorplanner is a free online tool that allows you to create 2D and 3D floor plans. Floorplanner is easy to use and has a wide range of features, including the ability to import furniture and fixtures from a library.
- SmartDraw
SmartDraw is a paid software program that offers a wide range of features for creating floor plans, including the ability to create 2D and 3D floor plans, import images and CAD files, and collaborate with others.
- CAD Pro
CAD Pro is a paid software program that is specifically designed for creating floor plans. CAD Pro has a wide range of features, including the ability to create 2D and 3D floor plans, import images and CAD files, and collaborate with others.
When choosing a software program or online tool, it is important to consider your needs and budget. If you are new to floor planning, you may want to start with a free and easy-to-use program like SketchUp or Floorplanner. If you need more advanced features, you may want to consider a paid program like SmartDraw or CAD Pro.
Start with a basic layout.
The first step to creating a floor plan is to start with a basic layout. This will help you visualize the space and get a sense of the overall dimensions. To create a basic layout, simply draw a rectangle or square to represent the room. Then, add any major features, such as windows, doors, and walls.
- Start with a simple shape.
The simplest way to create a basic layout is to start with a simple shape, such as a rectangle or square. This will give you a good starting point and make it easy to add more details later.
- Add walls.
Once you have a basic shape, you can start adding walls. Walls can be added by drawing lines between the corners of the shape. Be sure to measure the walls accurately so that your floor plan is to scale.
- Add windows and doors.
Windows and doors can be added by drawing rectangles or squares on the walls. Be sure to measure the windows and doors accurately and note the location of any door swings.
- Add other features.
Once you have added the walls, windows, and doors, you can start adding other features, such as furniture, fixtures, and appliances. This will help you visualize the space and make informed decisions about your home renovation or design project.
Once you have created a basic layout, you can start to experiment with different arrangements. This is a great way to see how different furniture and fixtures will fit in the space and to find the best layout for your needs.
Add walls, windows, and doors.
Once you have created a basic layout, you can start adding walls, windows, and doors. This will help you visualize the space and get a sense of the overall dimensions.
- Add walls.
Walls can be added by drawing lines between the corners of the shape. Be sure to measure the walls accurately so that your floor plan is to scale. You can also use the “Wall” tool in your software or online tool to add walls.
- Add windows.
Windows can be added by drawing rectangles or squares on the walls. Be sure to measure the windows accurately and note the location of any window swings. You can also use the “Window” tool in your software or online tool to add windows.
- Add doors.
Doors can be added by drawing rectangles or squares on the walls. Be sure to measure the doors accurately and note the location of any door swings. You can also use the “Door” tool in your software or online tool to add doors.
Once you have added the walls, windows, and doors, you can start to experiment with different arrangements. This is a great way to see how different furniture and fixtures will fit in the space and to find the best layout for your needs.
Include furniture and fixtures.
Once you have added the walls, windows, and doors, you can start adding furniture and fixtures. This will help you visualize the space and make informed decisions about your home renovation or design project.
- Start with the big pieces.
The first step is to add the big pieces of furniture, such as sofas, beds, and tables. This will help you get a sense of the overall layout of the space and how the furniture will fit together.
- Add smaller pieces.
Once you have added the big pieces, you can start adding smaller pieces, such as chairs, ottomans, and lamps. This will help you fill out the space and make it more realistic.
- Use layers.
If you are using a software program or online tool to create your floor plan, you can use layers to organize your furniture and fixtures. This will make it easier to edit and move items around.
- Experiment with different arrangements.
Once you have added all of the furniture and fixtures, you can start to experiment with different arrangements. This is a great way to see how different layouts will work in the space and to find the best layout for your needs.
Once you are happy with the layout of your furniture and fixtures, you can save your floor plan. This will allow you to come back and edit it later, or to share it with others.
Experiment with different layouts.
Once you have added all of the furniture and fixtures, you can start to experiment with different layouts. This is a great way to see how different layouts will work in the space and to find the best layout for your needs.
There are a few different ways to experiment with different layouts. One way is to use a software program or online tool that allows you to drag and drop furniture and fixtures around. This is a great way to quickly and easily try out different arrangements.
Another way to experiment with different layouts is to use graph paper. Draw a to-scale floor plan of your room on the graph paper. Then, cut out pieces of paper to represent your furniture and fixtures. You can then move the pieces of paper around on the graph paper to try out different arrangements.
Once you have experimented with different layouts, you can choose the layout that you like the best. You can then save your floor plan and use it to guide your home renovation or design project.
Here are some tips for experimenting with different layouts:
- Start with a blank slate. Remove all of the furniture and fixtures from the room so that you can start with a clean slate.
- Measure the room carefully. This will help you to create a to-scale floor plan.
- Use graph paper or a software program to create a floor plan. This will help you to visualize the space and to experiment with different layouts.
- Cut out pieces of paper to represent your furniture and fixtures. This will make it easy to move the pieces around and to try out different arrangements.
- Experiment with different arrangements. Try out different ways of arranging your furniture and fixtures to see what works best for you.
- Once you have found a layout that you like, save your floor plan. This will allow you to come back and edit it later, or to share it with others.
Get feedback from others.
Once you have created a floor plan, it is a good idea to get feedback from others. This can help you to identify any areas that need improvement and to get new ideas for your design.
There are a few different ways to get feedback on your floor plan. One way is to ask friends or family members for their opinion. Another way is to post your floor plan on a home improvement forum or online community. You can also hire a professional designer to review your floor plan.
When you are getting feedback from others, be sure to ask specific questions about the layout, the furniture arrangement, and the overall design. This will help you to get the most constructive feedback possible.
Once you have received feedback from others, take some time to consider their suggestions. You may not agree with all of the feedback you receive, but it is important to be open to new ideas. By getting feedback from others, you can improve your floor plan and create a space that you love.
Here are some tips for getting feedback from others:
- Choose the right people to ask for feedback.
When asking for feedback, it is important to choose people who are knowledgeable about home design and who have a good eye for detail.
- Be specific about what you want feedback on.
When asking for feedback, be sure to ask specific questions about the layout, the furniture arrangement, and the overall design. This will help you to get the most constructive feedback possible.
- Be open to new ideas.
When you are getting feedback from others, it is important to be open to new ideas. You may not agree with all of the feedback you receive, but it is important to consider all of the suggestions before making any changes to your floor plan.
- Thank people for their feedback.
Once you have received feedback from others, be sure to thank them for their time and input. This will show that you appreciate their help and that you value their opinion.
Save your floor plan.
Once you are happy with your floor plan, it is important to save it. This will allow you to come back and edit it later, or to share it with others.
There are a few different ways to save your floor plan. If you are using a software program to create your floor plan, you can simply click the “Save” button. If you are using an online tool, you can usually save your floor plan by clicking the “Export” button.
When you save your floor plan, be sure to give it a name that you will remember. You may also want to save it in a specific folder on your computer.
Once you have saved your floor plan, you can share it with others by sending them the file or by posting it online.
Here are some tips for saving your floor plan:
- Give your floor plan a descriptive name.
This will help you to identify the floor plan later, especially if you have multiple floor plans saved.
- Save your floor plan in a specific folder.
This will help you to keep your floor plans organized and easy to find.
- Back up your floor plans.
It is a good idea to back up your floor plans in case your computer crashes or your files get corrupted.
- Share your floor plans with others.
You can share your floor plans with others by sending them the file or by posting it online.


Related Posts