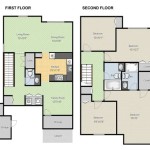
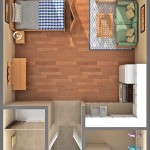
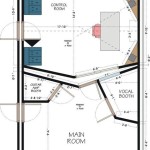
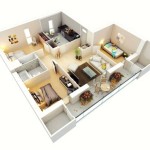
A floor plan is a scaled drawing that shows the layout of a building or a room. It includes the walls, doors, windows, and other fixtures. Floor plans are used by architects, builders, and interior designers to plan the construction and layout of buildings. They can also be used by homeowners to visualize the layout of their homes and to make changes to the design.
Creating a floor plan in Excel is a relatively simple process. Once you have a basic understanding of the software, you can create a floor plan that is both accurate and visually appealing. In this article, we will walk you through the steps of creating a floor plan in Excel.
Before we begin, it is important to gather all of the necessary information. This includes the dimensions of the room or building, the location of the walls, doors, and windows, and the location of any other fixtures. Once you have all of this information, you can begin creating your floor plan.
Here are 9 important points about how to create a floor plan in Excel:
- Gather all of the necessary information.
- Create a new Excel worksheet.
- Draw the walls of the room or building.
- Add the doors and windows.
- Add any other fixtures.
- Format the floor plan.
- Add dimensions.
- Save the floor plan.
- Print the floor plan.
By following these steps, you can create a floor plan in Excel that is both accurate and visually appealing.
Gather all of the necessary information.
Before you begin creating a floor plan in Excel, it is important to gather all of the necessary information. This includes:
- The dimensions of the room or building. This includes the length, width, and height of the space. If you are creating a floor plan for an existing space, you can measure the space yourself or consult the building plans. If you are creating a floor plan for a new space, you will need to estimate the dimensions based on your design plans.
- The location of the walls, doors, and windows. This information can be found in the building plans or by measuring the space yourself. Be sure to note the size and location of all doors and windows, as well as the direction in which they open.
- The location of any other fixtures. This includes things like furniture, appliances, and built-in cabinetry. If you are creating a floor plan for an existing space, you can simply note the location of the fixtures. If you are creating a floor plan for a new space, you will need to decide where you want to place the fixtures based on your design plans.
- Any other relevant information. This could include things like the location of electrical outlets, plumbing fixtures, or HVAC vents. Any information that you think will be helpful when creating your floor plan should be gathered at this stage.
Once you have gathered all of the necessary information, you can begin creating your floor plan in Excel.
Create a new Excel worksheet.
The first step in creating a floor plan in Excel is to create a new Excel worksheet. To do this, open Excel and click on the “File” tab. Then, click on “New” and select “Blank workbook.” A new Excel worksheet will be created.
Once you have created a new worksheet, you need to set up the page margins. To do this, click on the “Page Layout” tab and then click on the “Margins” button. In the “Page Setup” dialog box, select the “Custom” option and then set the margins to 0.5 inches on all sides. This will give you a larger area to work with when creating your floor plan.
Next, you need to freeze the top row and left column of the worksheet. To do this, click on the “View” tab and then click on the “Freeze Panes” button. In the “Freeze Panes” dialog box, select the “Freeze Top Row” and “Freeze First Column” options. This will keep the top row and left column of the worksheet visible as you scroll down and to the right, which will make it easier to create your floor plan.
Draw the walls of the room or building.
The first step in drawing the walls of the room or building is to create a rectangle that represents the outer perimeter of the space. To do this, click on the “Insert” tab and then click on the “Shapes” button. In the “Shapes” menu, select the “Rectangle” shape. Then, click and drag on the worksheet to create a rectangle that represents the outer perimeter of the room or building. You can also use the “Size and Position” options in the “Format” tab to change the size and position of the rectangle.
Once you have created the rectangle, you can begin drawing the walls. To do this, click on the “Line” shape in the “Shapes” menu. Then, click and drag on the worksheet to create a line that represents a wall. You can also use the “Size and Position” options in the “Format” tab to change the size and position of the line.
Continue drawing lines to represent all of the walls in the room or building. Be sure to connect the lines at the corners to create a closed shape. You can also use the “Align” and “Distribute” options in the “Format” tab to align and distribute the lines evenly.
Once you have drawn all of the walls, you can add doors and windows to the floor plan. To do this, click on the “Insert” tab and then click on the “Shapes” button. In the “Shapes” menu, select the “Rectangle” or “Ellipse” shape to represent the door or window. Then, click and drag on the worksheet to create the shape. You can also use the “Size and Position” options in the “Format” tab to change the size and position of the shape.
Add the doors and windows.
Once you have drawn the walls of the room or building, you can add doors and windows to the floor plan. To do this, click on the “Insert” tab and then click on the “Shapes” button. In the “Shapes” menu, select the “Rectangle” or “Ellipse” shape to represent the door or window. Then, click and drag on the worksheet to create the shape. You can also use the “Size and Position” options in the “Format” tab to change the size and position of the shape.
- For doors, be sure to indicate the direction in which they open. You can do this by adding an arrow to the door shape. To add an arrow, click on the “Insert” tab and then click on the “Shapes” button. In the “Shapes” menu, select the “Line” shape. Then, click and drag on the worksheet to create a line that represents the direction in which the door opens. You can also use the “Size and Position” options in the “Format” tab to change the size and position of the line.
- For windows, be sure to indicate the type of window. You can do this by adding a label to the window shape. To add a label, click on the “Insert” tab and then click on the “Text Box” button. In the “Text Box” dialog box, type the label for the window. You can also use the “Size and Position” options in the “Format” tab to change the size and position of the text box.
- You can also add additional details to the doors and windows, such as handles, knobs, and hinges. To do this, use the “Shapes” and “Lines” tools in the “Insert” tab. You can also use the “Format” tab to change the color, size, and position of the shapes and lines.
- Once you have added all of the doors and windows to the floor plan, you can group them together. To do this, select all of the doors and windows and then click on the “Group” button in the “Arrange” tab. This will group the doors and windows together so that you can move and resize them as a single object.
By following these steps, you can add doors and windows to your floor plan in Excel.
Add any other fixtures.
In addition to walls, doors, and windows, you may also want to add other fixtures to your floor plan. This could include things like furniture, appliances, and built-in cabinetry. To add a fixture to your floor plan, simply click on the “Insert” tab and then click on the “Shapes” button. In the “Shapes” menu, select the shape that best represents the fixture you want to add. Then, click and drag on the worksheet to create the shape. You can also use the “Size and Position” options in the “Format” tab to change the size and position of the shape.
Once you have created the shape, you can add additional details to the fixture. For example, you could add a label to the shape to indicate what type of fixture it is. You could also add lines or other shapes to represent the different parts of the fixture. For example, you could add a line to represent the handle of a door or a circle to represent the knob of a cabinet.
You can also group fixtures together. To do this, select all of the fixtures that you want to group and then click on the “Group” button in the “Arrange” tab. This will group the fixtures together so that you can move and resize them as a single object.
By following these steps, you can add any other fixtures to your floor plan in Excel.
Format the floor plan.
Once you have added all of the elements to your floor plan, you can begin formatting it. This includes adding color, borders, and other design elements to make the floor plan more visually appealing and easier to read.
To add color to your floor plan, select the shapes that you want to color and then click on the “Fill” button in the “Format” tab. In the “Fill” menu, select the color that you want to use. You can also use the “Fill Effects” option to add a gradient or texture to the fill.
To add borders to your floor plan, select the shapes that you want to add borders to and then click on the “Border” button in the “Format” tab. In the “Border” menu, select the type of border that you want to use. You can also use the “Border Color” and “Border Weight” options to change the color and weight of the border.
In addition to color and borders, you can also add other design elements to your floor plan, such as shadows, reflections, and glows. To add a shadow to a shape, select the shape and then click on the “Shadow” button in the “Format” tab. In the “Shadow” menu, select the type of shadow that you want to use. You can also use the “Shadow Color” and “Shadow Offset” options to change the color and offset of the shadow.
Add dimensions.
Adding dimensions to your floor plan is an important step, as it will help you to accurately visualize the space and make sure that everything fits together properly. To add dimensions to your floor plan, follow these steps:
- Select the shapes that you want to add dimensions to. You can select multiple shapes at once by holding down the Shift key while clicking on each shape.
- Click on the “Format” tab.
- Click on the “Size and Position” button.
- In the “Size and Position” dialog box, select the “Height” and “Width” fields.
- Enter the dimensions for the selected shapes.
- Click on the “OK” button.
Your selected shapes will now have dimensions added to them. You can also use the “Align” and “Distribute” options in the “Format” tab to align and distribute the dimensions evenly.
Save the floor plan.
Once you have finished creating your floor plan, you need to save it so that you can access it later. To save the floor plan, click on the “File” tab and then click on the “Save” button. In the “Save As” dialog box, enter a name for the file and select a location to save the file. Then, click on the “Save” button.
- Save your floor plan in a location where you can easily find it later. You may want to create a specific folder for your floor plans so that they are all organized in one place.
- Give your floor plan a descriptive name so that you can easily identify it later. For example, you could name your floor plan “Living Room Floor Plan” or “Bedroom Floor Plan.”
- Save your floor plan in a file format that is compatible with Excel. The default file format for Excel is .xlsx. However, you can also save your floor plan in other file formats, such as .xls, .csv, and .pdf.
- Once you have saved your floor plan, you can share it with others by sending them a copy of the file. You can also upload your floor plan to the cloud so that you can access it from anywhere.
By following these steps, you can save your floor plan and access it later.
Print the floor plan.
Once you have finished creating your floor plan, you may want to print it out so that you can share it with others or use it for reference. To print the floor plan, follow these steps:
1. Click on the “File” tab and then click on the “Print” button.
2. In the “Print” dialog box, select the printer that you want to use.
3. Select the paper size that you want to use.
4. Select the orientation of the floor plan (portrait or landscape).
5. Click on the “Print” button.
Your floor plan will now be printed.
Here are some additional tips for printing your floor plan:
- Use a high-quality printer to get the best results.
- Use a paper size that is large enough to accommodate your floor plan.
- Select the correct orientation for your floor plan.
- Print a test copy of your floor plan to make sure that everything looks correct before printing the final copy.
By following these tips, you can print a high-quality floor plan that you can share with others or use for reference.


Related Posts