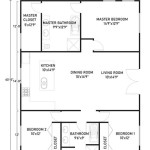
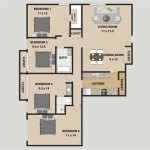
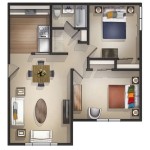
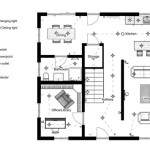
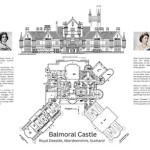
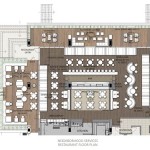
A floor plan is a scaled drawing that shows the layout of a building, including the arrangement of rooms, walls, doors, and windows. Floor plans are essential for construction, renovation, and interior design, as they provide a clear and accurate representation of the space available.
Creating a floor plan can be a daunting task, but it is essential for any building project. By following these steps, you can create a floor plan that will help you visualize your space and make informed decisions about your design.
In this article, we will discuss the basics of creating a floor plan, including how to measure and draw your space, how to choose the right scale, and how to add furniture and fixtures. We will also provide tips on how to use floor plans to plan your construction or renovation project.
When creating a floor plan, there are a few important points to keep in mind:
- Measure your space accurately.
- Choose the right scale for your floor plan.
- Draw the walls and doors.
- Add windows and other openings.
- Include furniture and fixtures.
- Label all rooms and spaces.
- Add dimensions to your floor plan.
- Use a legend to explain any symbols or abbreviations.
- Review your floor plan carefully before finalizing it.
By following these tips, you can create a floor plan that will be clear, accurate, and easy to use.
## Measure your space accurately.
The first step in creating a floor plan is to measure your space accurately. This means measuring the length and width of each room, as well as the height of the ceiling. You should also measure the location of any windows, doors, and other openings.
- Use a measuring tape to measure the length and width of each room.
Be sure to measure from wall to wall, including any closets or alcoves.
- Use a level to measure the height of the ceiling.
Measure from the floor to the ceiling in several different locations in each room to ensure that the ceiling is level.
- Measure the location of any windows, doors, and other openings.
Measure from the nearest wall to the center of the window, door, or other opening.
- Sketch out a rough floor plan as you measure.
This will help you to visualize the layout of your space and to identify any potential problems.
Once you have measured your space accurately, you can begin to create a floor plan.
Choose the right scale for your floor plan.
The scale of your floor plan is the ratio of the size of the drawing to the size of the actual space. Choosing the right scale is important to ensure that your floor plan is clear and easy to read. If the scale is too small, the floor plan will be difficult to see and understand. If the scale is too large, the floor plan will be too big to fit on a single sheet of paper.
There are a few different scales that you can use for your floor plan. The most common scale is 1/4 inch = 1 foot. This means that 1/4 inch on your floor plan represents 1 foot in the actual space. Other common scales include 1/8 inch = 1 foot and 1/2 inch = 1 foot.
When choosing a scale, you need to consider the size of your space and the level of detail that you want to show on your floor plan. If you have a small space, you may want to use a larger scale, such as 1/2 inch = 1 foot. This will allow you to show more detail on your floor plan.
If you have a large space, you may want to use a smaller scale, such as 1/8 inch = 1 foot. This will make your floor plan more compact and easier to read. It is also important to consider the purpose of your floor plan when choosing a scale. If you are creating a floor plan for construction purposes, you will need to use a scale that is accurate and easy to measure. If you are creating a floor plan for marketing purposes, you may want to use a scale that is more visually appealing.
Draw the walls and doors.
Once you have chosen a scale for your floor plan, you can begin to draw the walls and doors. Start by drawing the exterior walls of the building. Then, draw the interior walls, including any closets or alcoves.
- Use a ruler or T-square to draw straight lines for the walls.
Be sure to measure carefully and to make sure that the walls are parallel and perpendicular to each other.
- Draw the doors and windows.
Use a different symbol for each type of door or window. For example, you could use a rectangle for a door and a circle for a window.
- Label the doors and windows.
This will help you to identify each door and window later on.
- Add any other details to the walls.
This could include things like fireplaces, built-in shelves, or niches.
Once you have drawn the walls and doors, you can begin to add furniture and fixtures to your floor plan.
Add windows and other openings.
Once you have drawn the walls and doors, you can begin to add windows and other openings to your floor plan. Windows and other openings can be represented by a variety of symbols, depending on their type and size. For example, a simple rectangle can be used to represent a window, while a more complex symbol may be used to represent a bay window or a sliding glass door.
When adding windows and other openings to your floor plan, be sure to include the following information:
- The type of window or opening.
This could be a window, a door, a skylight, or another type of opening.
- The size of the window or opening.
This should be measured in feet and inches.
- The location of the window or opening.
This should be measured from the nearest wall.
- Any other relevant information.
This could include the type of glass, the frame material, or the hardware.
Once you have added all of the windows and other openings to your floor plan, you can begin to add furniture and fixtures.
Tips for adding windows and other openings to your floor plan:
- Use a different symbol for each type of window or opening.
- Label each window and opening with its type and size.
- Use a consistent scale for all of the windows and openings.
- Be sure to include all of the relevant information for each window and opening.
Include furniture and fixtures.
Once you have added all of the windows and other openings to your floor plan, you can begin to add furniture and fixtures. Furniture and fixtures are any items that are attached to the building or that are not easily moved, such as cabinets, appliances, and built-in shelves.
- Choose the furniture and fixtures that you want to include in your floor plan.
This will depend on the purpose of your floor plan and the level of detail that you want to show.
- Draw the furniture and fixtures to scale.
Use a ruler or T-square to draw straight lines and to make sure that the furniture and fixtures are the correct size.
- Label the furniture and fixtures.
This will help you to identify each item later on.
- Add any other details to the furniture and fixtures.
This could include things like the type of material, the color, or the style.
Once you have added all of the furniture and fixtures to your floor plan, you can begin to add dimensions and labels.
Label all rooms and spaces.
Once you have added all of the furniture and fixtures to your floor plan, it is important to label all of the rooms and spaces. This will help you to identify each room and space later on, and it will also make it easier to communicate your design to others.
To label a room or space, simply write its name inside the room or space. You can use a different color or font for each room or space to make it easier to distinguish between them.
Here are some tips for labeling rooms and spaces on your floor plan:
- Use clear and concise labels.
Avoid using abbreviations or jargon that others may not understand.
- Be consistent with your labeling.
Use the same font and color for all of the labels on your floor plan.
- Place the labels in a logical location.
Make sure that the labels are easy to read and that they do not interfere with the other elements on your floor plan.
Once you have labeled all of the rooms and spaces on your floor plan, you can begin to add dimensions and labels.
Add dimensions to your floor plan.
Once you have labeled all of the rooms and spaces on your floor plan, it is important to add dimensions to your floor plan. Dimensions are the measurements of the walls, doors, windows, and other features of your space. Adding dimensions to your floor plan will help you to ensure that your design is accurate and that your contractors can build your space according to your specifications.
- Measure the length and width of each room.
Write the measurements in feet and inches on your floor plan.
- Measure the height of each wall.
Write the measurements in feet and inches on your floor plan.
- Measure the width of each door and window.
Write the measurements in feet and inches on your floor plan.
- Measure the distance between each wall, door, and window.
Write the measurements in feet and inches on your floor plan.
Once you have added all of the dimensions to your floor plan, you can begin to add labels and a legend.
Use a legend to explain any symbols or abbreviations.
A legend is a key that explains the meaning of any symbols or abbreviations that are used on your floor plan. Symbols and abbreviations can be used to represent a variety of things, such as different types of walls, doors, windows, and furniture. Using a legend will help to ensure that your floor plan is clear and easy to understand.
- Create a list of all of the symbols and abbreviations that you have used on your floor plan.
Include a brief description of each symbol or abbreviation.
- Place the legend in a conspicuous location on your floor plan.
The legend should be easy to find and read.
- Use a consistent format for your legend.
For example, you could use a table or a list to display the symbols and abbreviations.
- Update your legend as needed.
If you add or change any symbols or abbreviations on your floor plan, be sure to update your legend accordingly.
Using a legend will help to make your floor plan more clear and easy to understand. It is a good practice to use a legend on all of your floor plans.
Review your floor plan carefully before finalizing it.
Once you have completed your floor plan, it is important to review it carefully before finalizing it. This will help you to identify any errors or omissions that you may have made. It is also a good idea to get feedback from others on your floor plan, such as your contractor, architect, or interior designer.
Here are some things to look for when reviewing your floor plan:
- Make sure that the floor plan is accurate and to scale.
Check the measurements of the walls, doors, windows, and other features to make sure that they are correct. You should also make sure that the floor plan is drawn to scale so that you can accurately visualize the space.
- Make sure that the floor plan is functional.
Consider how you will use the space and make sure that the floor plan accommodates your needs. For example, if you entertain often, you may want to make sure that the floor plan includes a large living room and dining room.
- Make sure that the floor plan is aesthetically pleasing.
Consider the overall look and feel of the space and make sure that the floor plan reflects your desired style. For example, if you prefer a modern look, you may want to choose a floor plan with clean lines and open spaces.
Once you have reviewed your floor plan and made any necessary changes, you can finalize it. Once your floor plan is finalized, you can use it to create a construction plan, a renovation plan, or an interior design plan.


Related Posts