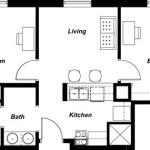
A floor plan is a drawing that shows the layout of a room or building. It typically includes walls, windows, doors, and other fixtures. Floor plans are used for a variety of purposes, such as planning renovations, designing new buildings, and selling or renting property.
Sketching a floor plan is a relatively simple task that can be completed with a few basic tools. In this article, we will provide step-by-step instructions on how to sketch a floor plan. We will also provide tips on how to create a floor plan that is accurate, clear, and easy to read.
Once you have mastered the basics of sketching floor plans, you can use this skill to create detailed drawings of your own home or office. You can also use floor plans to help you plan renovations or design new buildings.
Here are 9 important points about how to sketch a floor plan:
- Measure the room accurately.
- Draw the walls to scale.
- Include all windows and doors.
- Note the location of fixtures.
- Use different line weights for walls, windows, and doors.
- Add furniture and other details.
- Dimension the floor plan.
- Label the rooms and spaces.
- Keep the floor plan neat and tidy.
By following these tips, you can create a floor plan that is accurate, clear, and easy to read.
Measure the room accurately.
The first step in sketching a floor plan is to measure the room accurately. This will ensure that your floor plan is to scale and that all of the elements are in the correct proportion.
To measure the room, you will need a tape measure or laser measure. Start by measuring the length of the longest wall in the room. Then, measure the width of the room at its widest point. Once you have these two measurements, you can calculate the square footage of the room by multiplying the length by the width.
In addition to measuring the length and width of the room, you will also need to measure the height of the ceiling. This measurement is important if you are planning to include any built-in features, such as cabinets or bookshelves, in your floor plan.
Once you have all of the measurements, you can begin sketching your floor plan.
Draw the walls to scale.
Once you have measured the room accurately, you can begin drawing the walls to scale. To do this, you will need to use a scale that is appropriate for the size of the room.
- Use a scale of 1/4 inch = 1 foot. This scale is commonly used for small rooms, such as bedrooms and bathrooms.
To use this scale, divide the length and width of the room by 4. This will give you the length and width of the room in inches on your floor plan.
- Use a scale of 1/2 inch = 1 foot. This scale is commonly used for larger rooms, such as living rooms and dining rooms.
To use this scale, divide the length and width of the room by 2. This will give you the length and width of the room in inches on your floor plan.
- Use a scale of 1 inch = 1 foot. This scale is commonly used for very large rooms, such as ballrooms and auditoriums.
To use this scale, divide the length and width of the room by 1. This will give you the length and width of the room in inches on your floor plan.
- Use a custom scale. If the room is an unusual size, you may need to use a custom scale. To do this, divide the length and width of the room by a number that will give you a reasonable scale for your floor plan.
Once you have chosen a scale, you can begin drawing the walls. Start by drawing the longest wall in the room. Then, draw the other walls, making sure to connect them at the corners.
Include all windows and doors.
Once you have drawn the walls, you need to include all of the windows and doors in the room. To do this, simply draw a rectangle for each window and door. Make sure to include the following details:
- The size of the window or door. Measure the width and height of the window or door and transfer these measurements to your floor plan.
- The location of the window or door. Measure the distance from the nearest wall to the center of the window or door and transfer this measurement to your floor plan.
- The type of window or door. Indicate whether the window or door is a single-hung window, double-hung window, sliding door, etc.
Once you have included all of the windows and doors, you can move on to the next step.
Note the location of fixtures.
Fixtures are any objects that are permanently attached to the walls, floor, or ceiling of a room. This includes items such as sinks, toilets, bathtubs, showers, cabinets, and appliances. When sketching a floor plan, it is important to note the location of all fixtures.
To note the location of a fixture, simply draw a symbol for the fixture on your floor plan. For example, you could draw a circle for a sink, a square for a toilet, and a rectangle for a bathtub. Make sure to include the following details:
- The size of the fixture. Measure the width and height of the fixture and transfer these measurements to your floor plan.
- The location of the fixture. Measure the distance from the nearest wall to the center of the fixture and transfer this measurement to your floor plan.
- The type of fixture. Indicate whether the fixture is a sink, toilet, bathtub, shower, cabinet, or appliance.
Once you have noted the location of all of the fixtures, you can move on to the next step.
In addition to the basic fixtures, you may also want to note the location of other items in the room, such as furniture, artwork, and plants. This will help to create a more complete and detailed floor plan.
When noting the location of fixtures and other items, be sure to use a consistent scale. This will help to ensure that your floor plan is accurate and easy to read.
Use different line weights for walls, windows, and doors.
One of the most important things to keep in mind when sketching a floor plan is to use different line weights for walls, windows, and doors. This will help to create a visual hierarchy and make your floor plan easier to read.
Walls should be drawn with the thickest line weight. This will help to emphasize the structure of the room and make it easy to see the layout of the space.
Windows should be drawn with a medium line weight. This will help to distinguish them from the walls, but will still allow them to stand out from the other elements on the floor plan.
Doors should be drawn with the thinnest line weight. This will help to create a sense of depth and make it easy to see the flow of traffic through the room.
By using different line weights for walls, windows, and doors, you can create a floor plan that is both visually appealing and easy to understand.
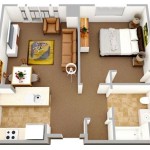
Add furniture and other details.
Once you have sketched the basic layout of the room, you can begin to add furniture and other details. This will help to create a more complete and realistic floor plan.
- Furniture: Draw each piece of furniture to scale and place it in the appropriate location on the floor plan. Be sure to include all of the major pieces of furniture, such as sofas, chairs, tables, and beds. You may also want to include smaller pieces of furniture, such as lamps, ottomans, and rugs.
- Appliances: Draw each appliance to scale and place it in the appropriate location on the floor plan. Be sure to include all of the major appliances, such as refrigerators, stoves, ovens, and dishwashers. You may also want to include smaller appliances, such as microwaves, toasters, and coffee makers.
- Fixtures: Draw each fixture to scale and place it in the appropriate location on the floor plan. Be sure to include all of the major fixtures, such as sinks, toilets, bathtubs, and showers. You may also want to include smaller fixtures, such as towel racks, soap dishes, and toilet paper holders.
- Other details: In addition to furniture, appliances, and fixtures, you may also want to include other details on your floor plan, such as artwork, plants, and curtains. These details will help to create a more complete and realistic floor plan.
When adding furniture and other details to your floor plan, be sure to use a consistent scale. This will help to ensure that your floor plan is accurate and easy to read.
Dimension the floor plan.
Once you have added all of the furniture and other details to your floor plan, you need to dimension it. Dimensioning a floor plan means adding measurements to the drawing so that it can be accurately constructed.
- Measure the length of each wall. Write the measurement next to the wall, above or below the line representing the wall.
- Measure the width of each room. Write the measurement next to the wall, above or below the line representing the wall.
- Measure the height of the ceiling. Write the measurement in the center of the room, above the line representing the ceiling.
- Measure the location of all doors and windows. Write the measurement from the nearest wall to the center of the door or window.
By dimensioning your floor plan, you will make it much easier for builders or contractors to construct the room or building. It will also make it easier for you to communicate your design ideas to others.
Label the rooms and spaces.
Once you have dimensioned your floor plan, you need to label the rooms and spaces. This will help to identify the purpose of each space and make your floor plan easier to read.
- Label each room with its name. For example, you could label the living room, dining room, kitchen, bedroom, and bathroom.
- Label each space with its function. For example, you could label the laundry room, mudroom, pantry, and closet.
- Label any other areas of the floor plan that need to be identified. For example, you could label the stairs, hallway, and garage.
- Use clear and concise labels. Avoid using abbreviations or jargon that may not be familiar to everyone.
By labeling the rooms and spaces on your floor plan, you will make it much easier for others to understand your design.
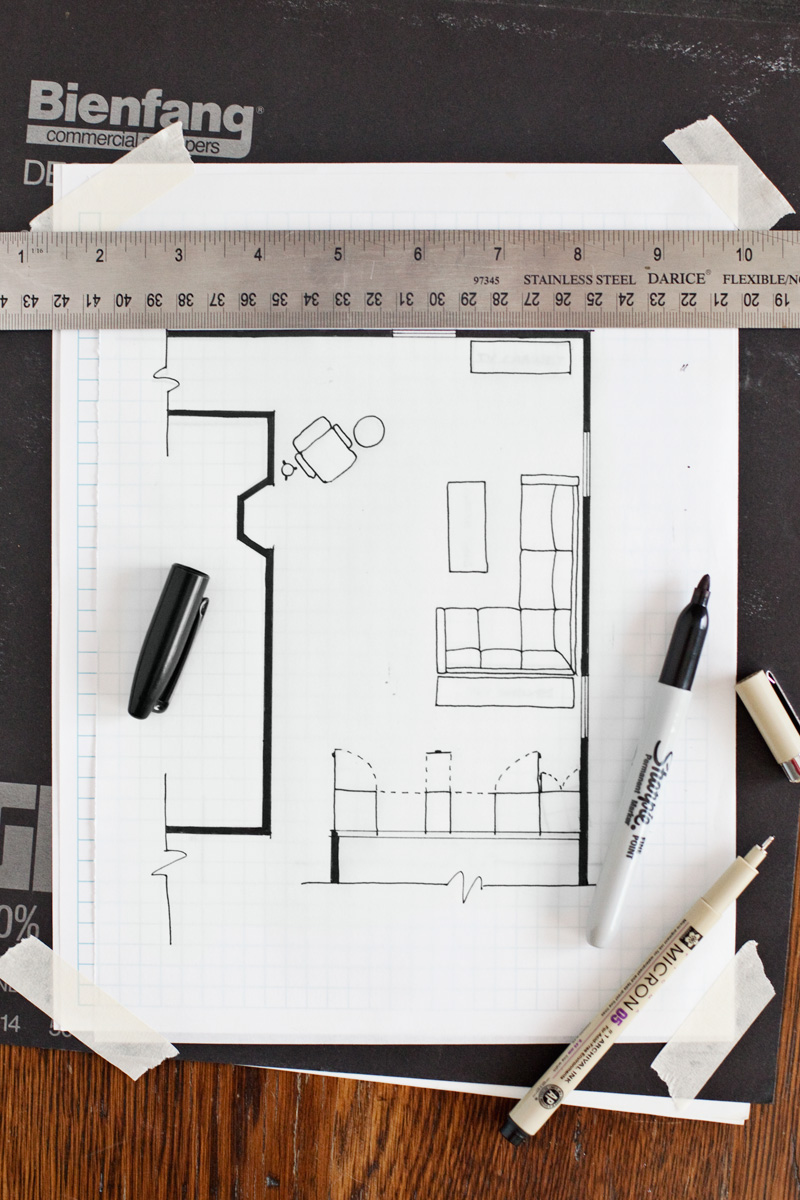
Keep the floor plan neat and tidy.
One of the most important things to keep in mind when sketching a floor plan is to keep it neat and tidy. A messy floor plan will be difficult to read and understand, and it may not be accurate. Here are a few tips for keeping your floor plan neat and tidy:
- Use a ruler or T-square to draw straight lines. This will help to create a clean and professional-looking floor plan.
- Use a sharp pencil to draw your lines. A dull pencil will create smudges and make your floor plan difficult to read.
- Erase any unnecessary lines. Once you have finished drawing your floor plan, erase any unnecessary lines or marks.
- Use a light touch when drawing your lines. This will help to prevent your floor plan from becoming too cluttered.
By following these tips, you can create a floor plan that is neat, tidy, and easy to read.


Related Posts